The Powerful Illustrator Shape Builder Tool
illustrator tips & tricks software adobe design
When I began to foray into Adobe’s Creative Suite, I was using Photoshop for everything. Need a logo for lots of uses? Just deliver a huge PNG! Want to draw a nice crisp illustration? Photoshop’s pen tool works just fine for that, right?
Photoshop was my one-stop for everything I needed, though none of what I needed was what Photoshop was created for. It was some time before I even considered using any of Adobe’s many great pieces of software that actually suited my needs, like Illustrator.
“But Illustrator is Hard”
When I began using Illustrator, drawing shapes and paths felt…different. I was having a hard getting my pen tool to do what I could so easily make it do in Photoshop. It seemed to want more precision from me, and I didn’t like it. This made me want to just keep using Photoshop and deliver a huge files to the client–not the way to go.
Also confounding me was the Pathfinder Tool. It was introduced to me as a way to combine many shapes into one complex shape, something I would have done in Photoshop by some combination of merging and masking. Understanding the Pathfinder Tool eluded me for some time. I’d find myself just clicking and undoing until I got the desired result.
A Challenger Steps Into the Ring: The Shape Builder Tool
The Shape Builder Tool solved both of the issues I had with drawing in Illustrator and even made drawing easier and the things I drew cleaner. The Shape Builder Tool allows you to draw many shapes and merge them together, like the Pathfinder tool. Unlike the Pathfinder, creating and merging shapes is as simple as adding or subtracting them by clicking and dragging. Let’s look at an example.
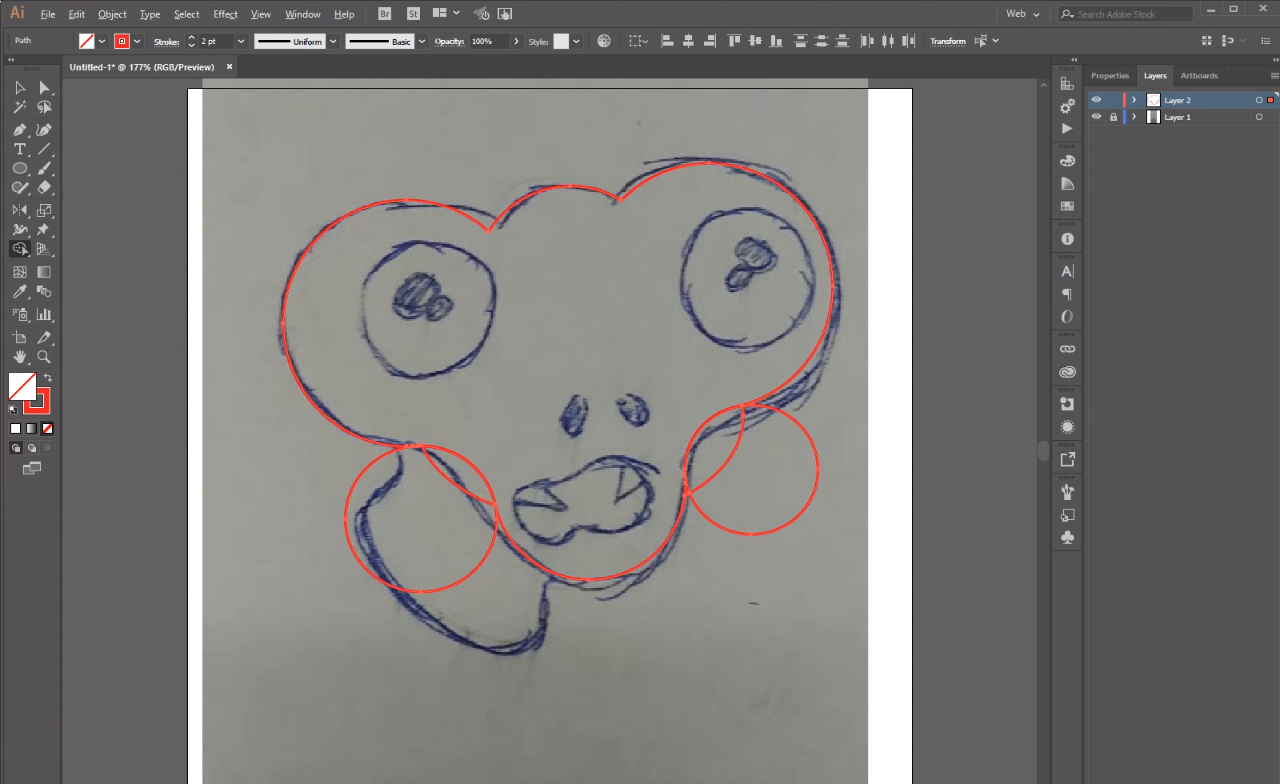
Here’s a little alien doodle. I want to make it a vector. I’m going to use circles to draw the alien instead of the pen tool, and then combine the shapes with the Shape Builder.
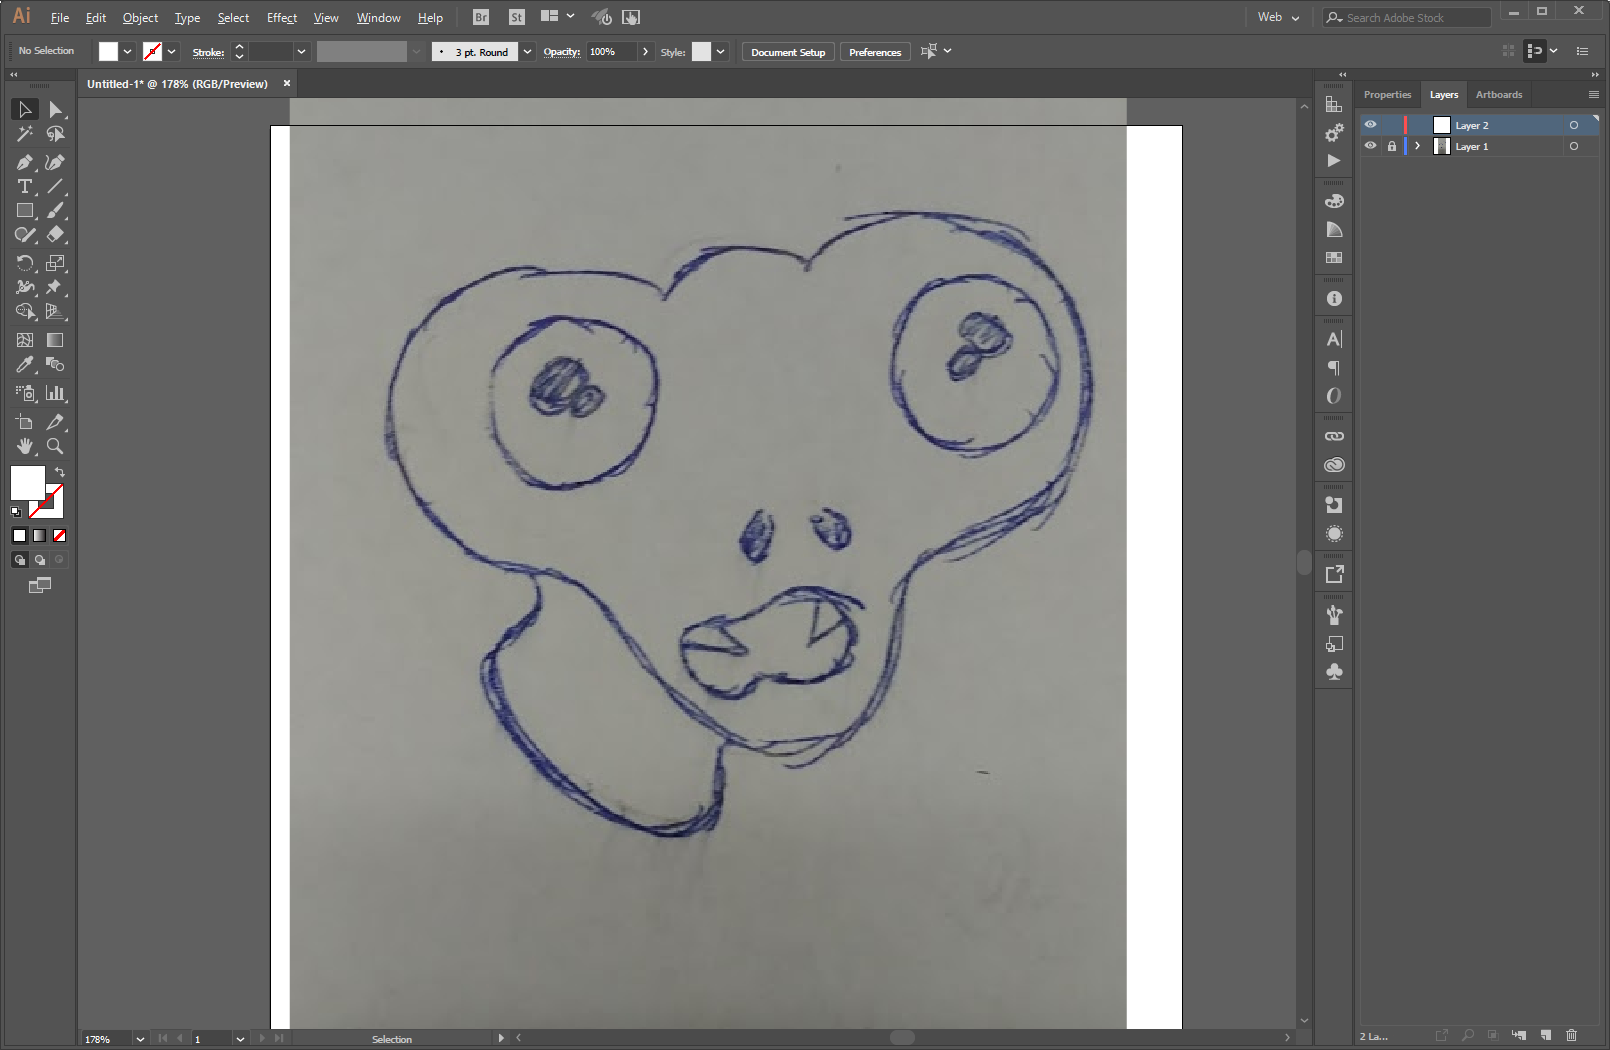
Scanned in drawing
First, I’ll add the circles, being sure to hold shift while I add so that they are perfectly symmetrical. Another great perk of this method is that using geometric shapes like a set of perfect circles adds a cleanness that is hard to achieve with the pen tool alone. The eye notices symmetry, even if unconsciously and the you’ll notice the difference when you build with shapes.
Notice that there are circles on the outside of the alien’s face. These serve to add outside curves and won’t be a part of the final product.
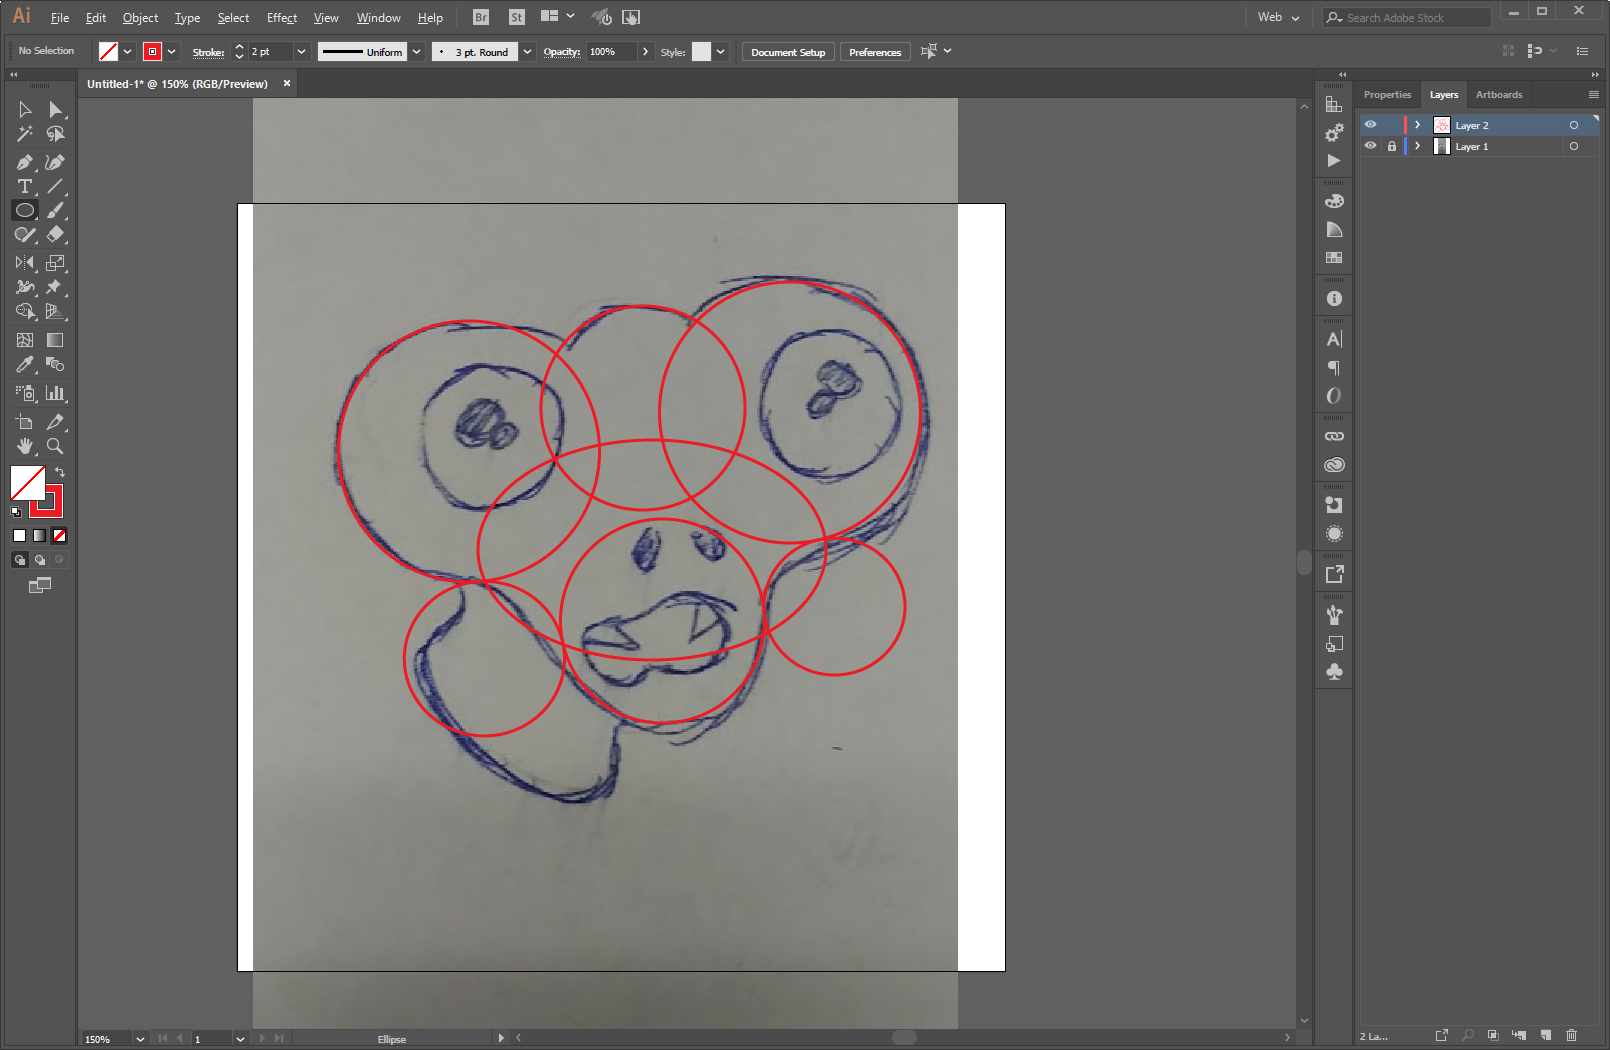
Block out the drawing with basic shapes. Just get the image covered evenly and don't worry about overlap.
Next, it’s important to make sure the circles are actually touching on their paths. Press ctrl/command + Y to enter outline mode and see exactly where the paths intersect.
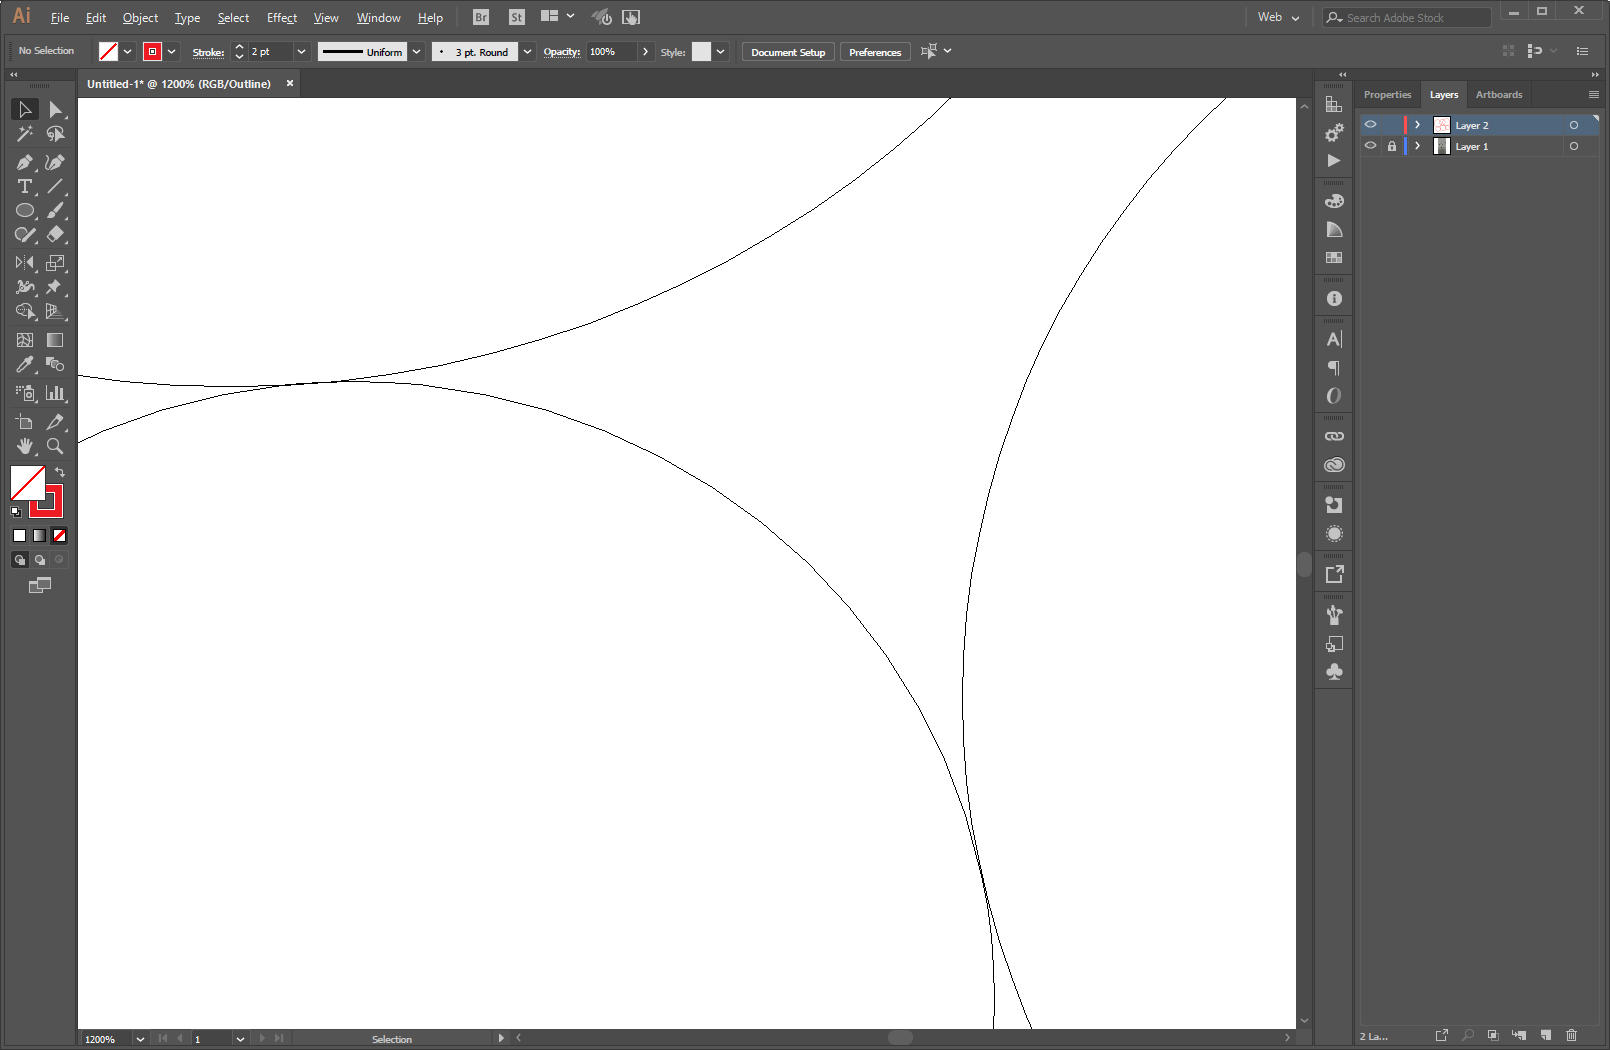
The outlines need to just be touching. You can enter outline mode and zoom in to see better.
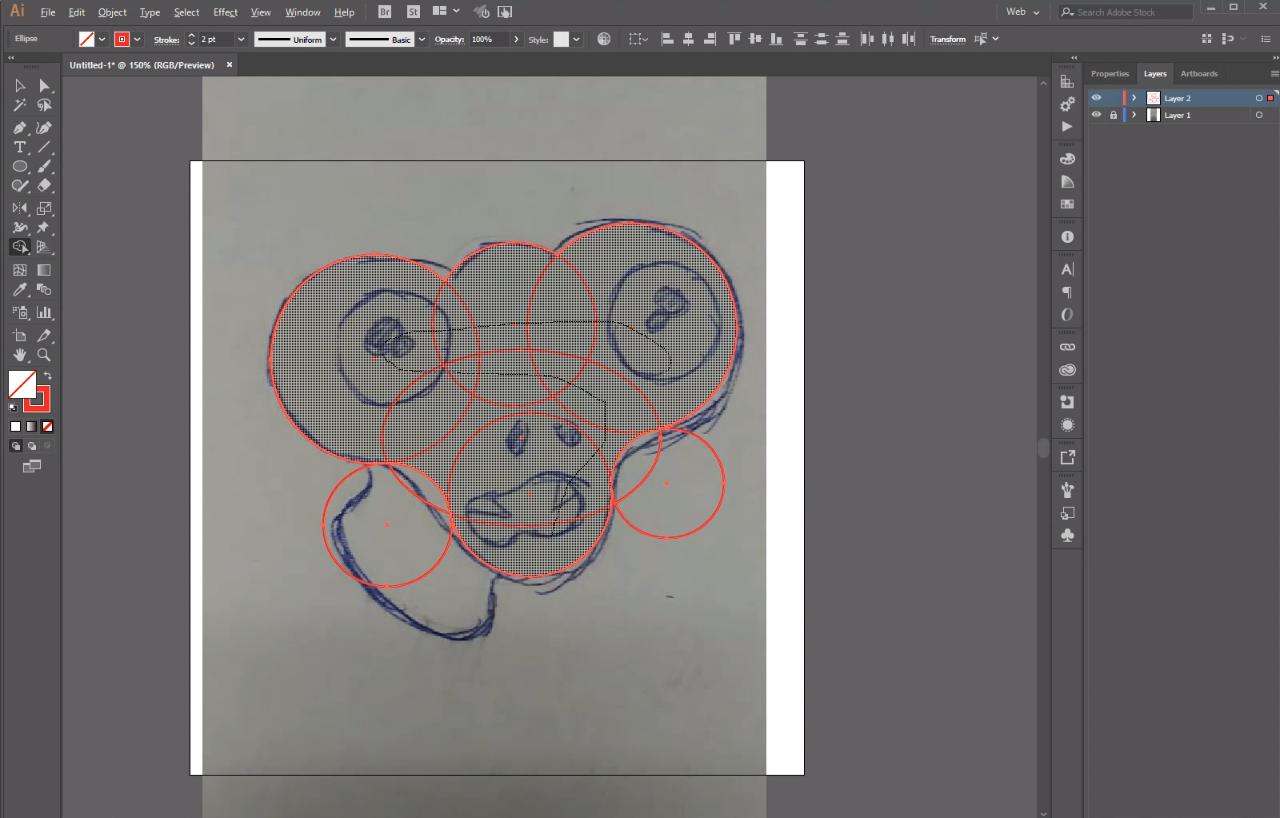
Now comes the magic of the Shape Builder. Select all the circles and switch to the Shape Builder tool. Notice that when you hover your mouse over your selection, your cursor gets a little plus sign (+). This indicates that you are adding to the shape. Click and drag over the items that you want to join.

Use the shape builder tool to join the shapes together.
Keep going until all the shapes that cover the drawing are included
When you release the mouse button, the shapes will join.
Now the shapes from before are joined into one big shape.
Now remove the parts you don’t want. The circles on his cheeks have no more purpose now that his face has been joined.
Follow the same procedure you did for adding to the joined shape, this time holding alt as you click and drag. Your cursor now has a minus sign (-) to indicate that you’re removing pieces of your shape.
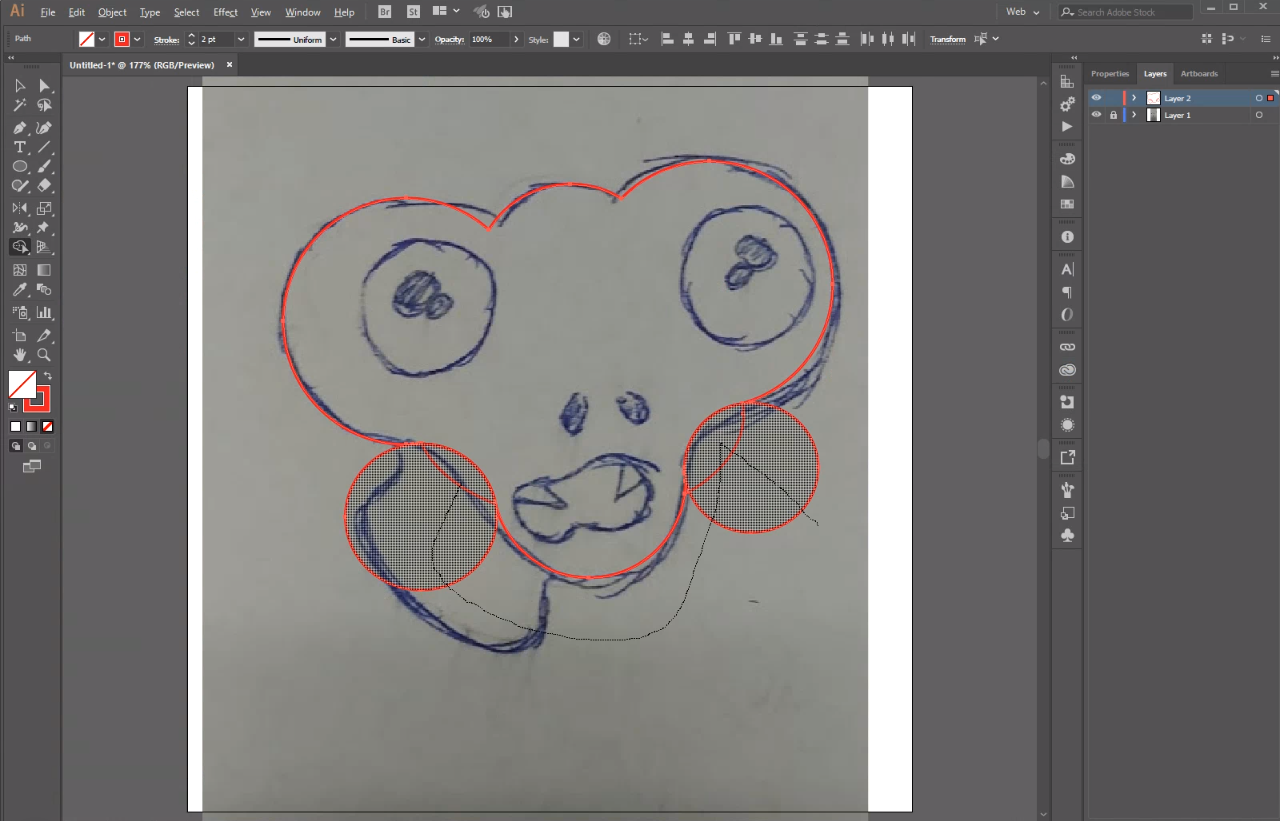
Remove all the extra bits that didn't cover our drawing.
I followed these steps a couple more times, adding shapes for the alien’s eyes and neck. The result is a smooth end product. The use of perfect circles makes the alien a little more pleasing to the eye, but the versatility of the Shape Builder allows for complex shapes that don’t really exist in reality.
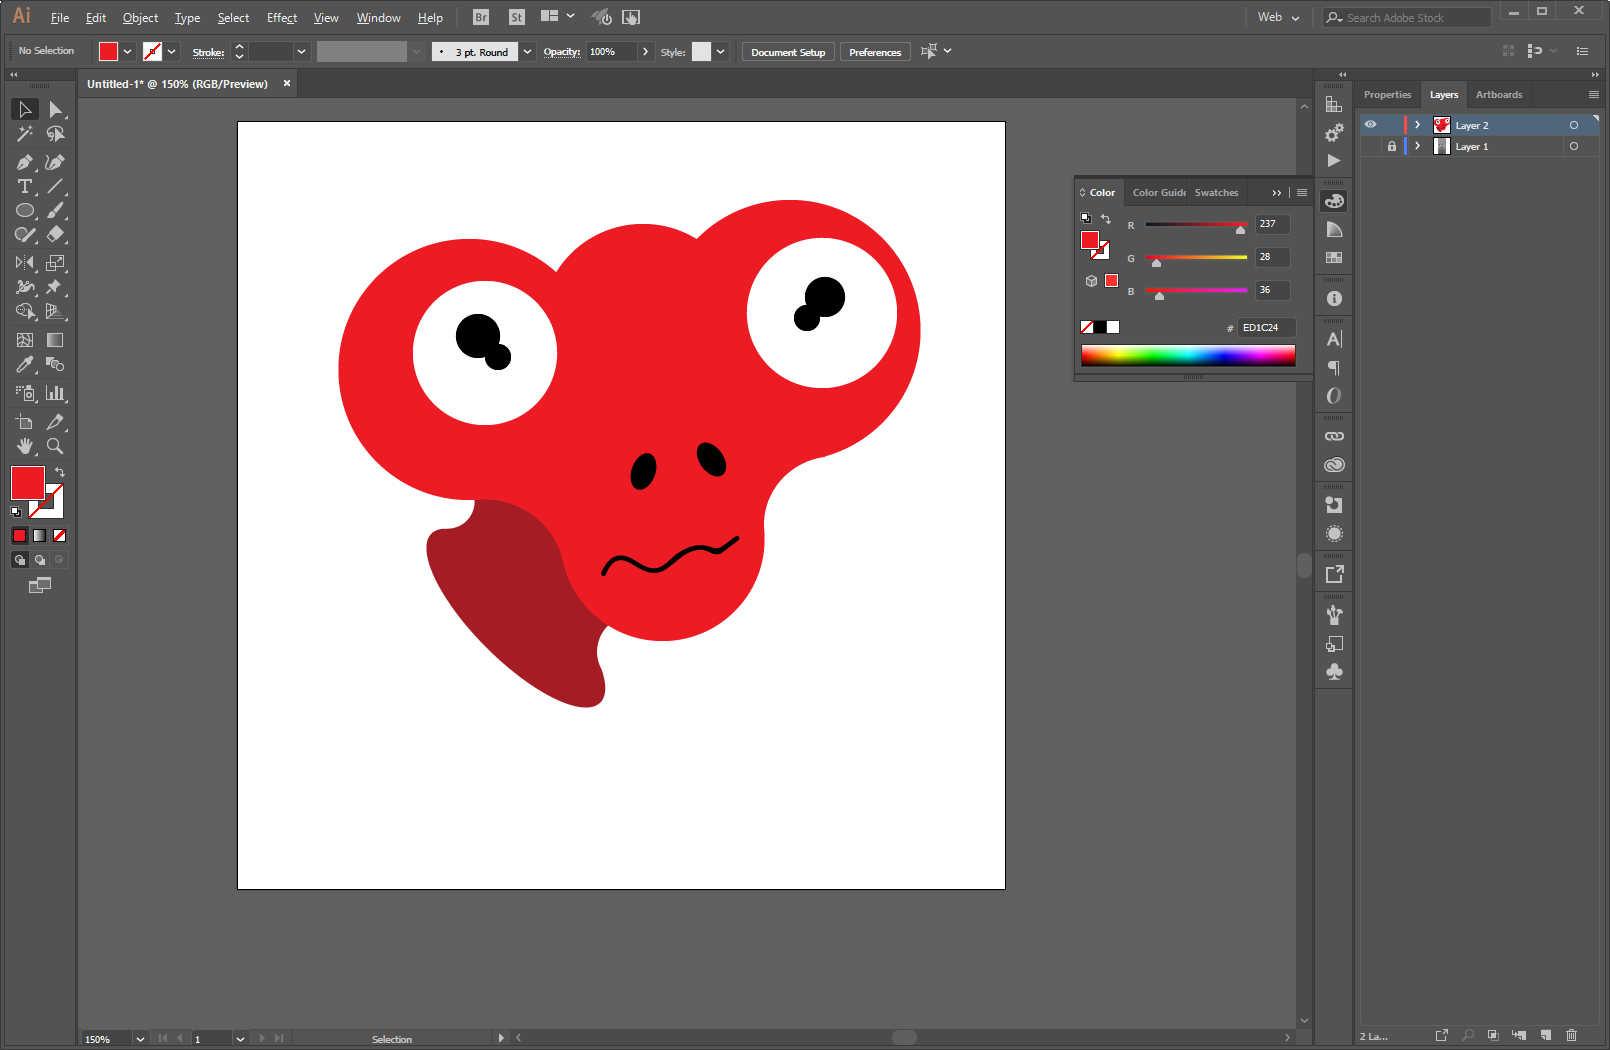
Once you have your shape, you can finish it up by coloring it.
I hope the Shape Builder tool is helpful for you in creating the complex shapes you need while not relying so heavily on the Pen tool and Pathfinder tool. Let me know how you find using the Shape Builder in the comments below!
comments powered by Disqus